How to integrate your terraform workflow in a CI/CD pipeline using Azure Devops
Part 3 of the ArgoCD mega tutorial
Introduction
This blog can be useful by itself if you already have terraform code to integrate into a pipeline, but it is also a follow up from the previous tutorial, where we setup an EKS cluster using terraform and S3 for the backend of terraform state.
How to setup an EKS cluster with terraform
It is as well, one of the founding steps for a bigger project, the argocd mega tutorial.
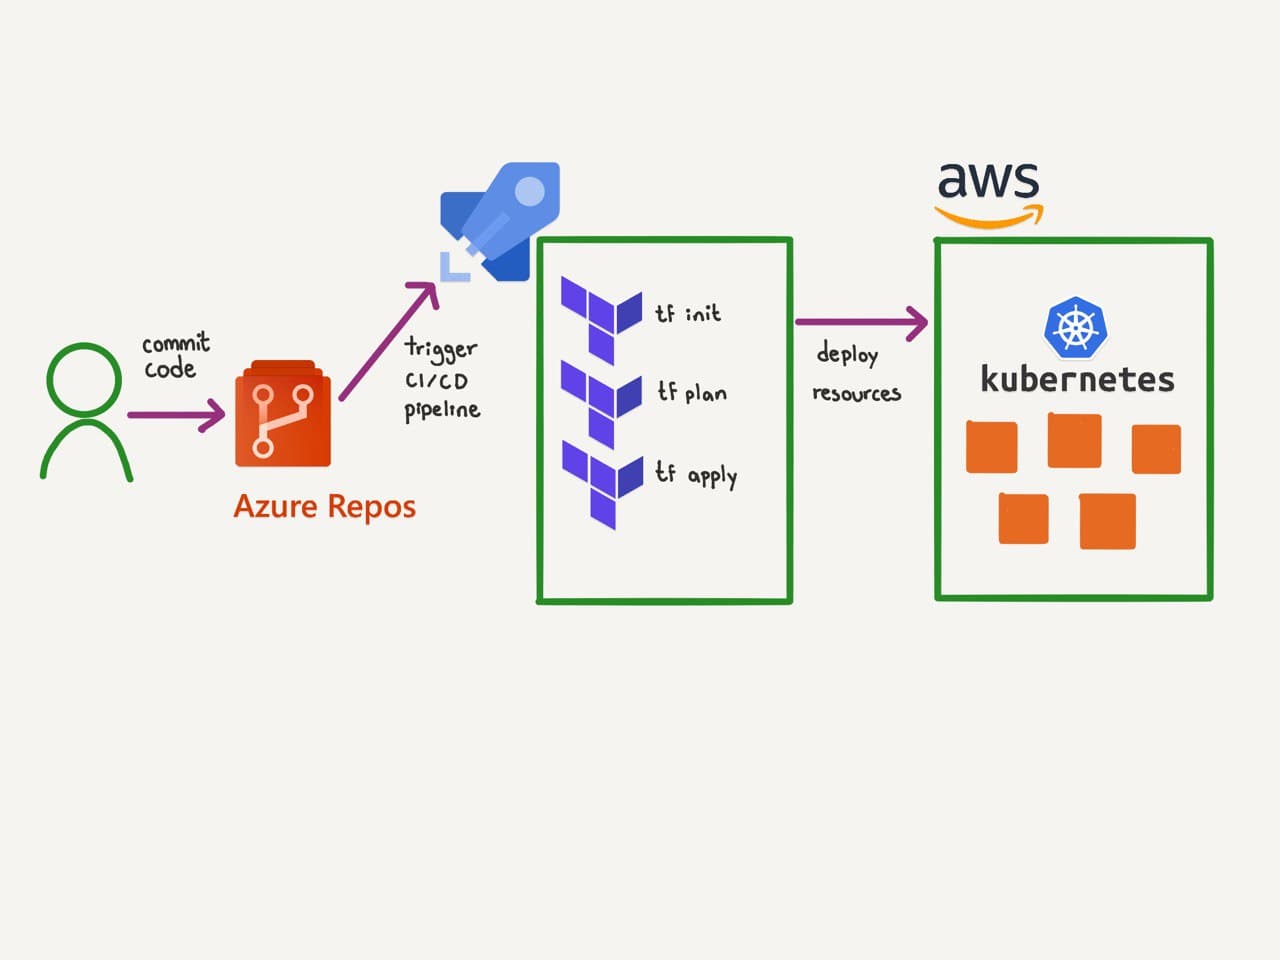
In the previous tutorial, the terraform commands were run from our local computer in the terminal. In this tutorial, we will not run them locally, instead we will run them from a pipeline, which could be triggered everytime we pushed a commit to the main branch, or merged a PR to main. Therefore, everytime we update the code relevant to our infrastructure, the pipeline will do the work for us and update our resources in the cloud. In this case the resources are a kubernetes cluster that lives in AWS.
Why Azure Devops?
The platform that I chose for this occasion to manage and run my pipeline is Azure Devops. It is free to use for individuals or teams of less than 5 people. You need a microsoft account. It allows you to store repositories of code, run pipelines, store artifacts, and manage your work with boards of task (Jira style). You can use as many features of Azure Devops as you like, as little features as you need.
You can get started on https://dev.azure.com/

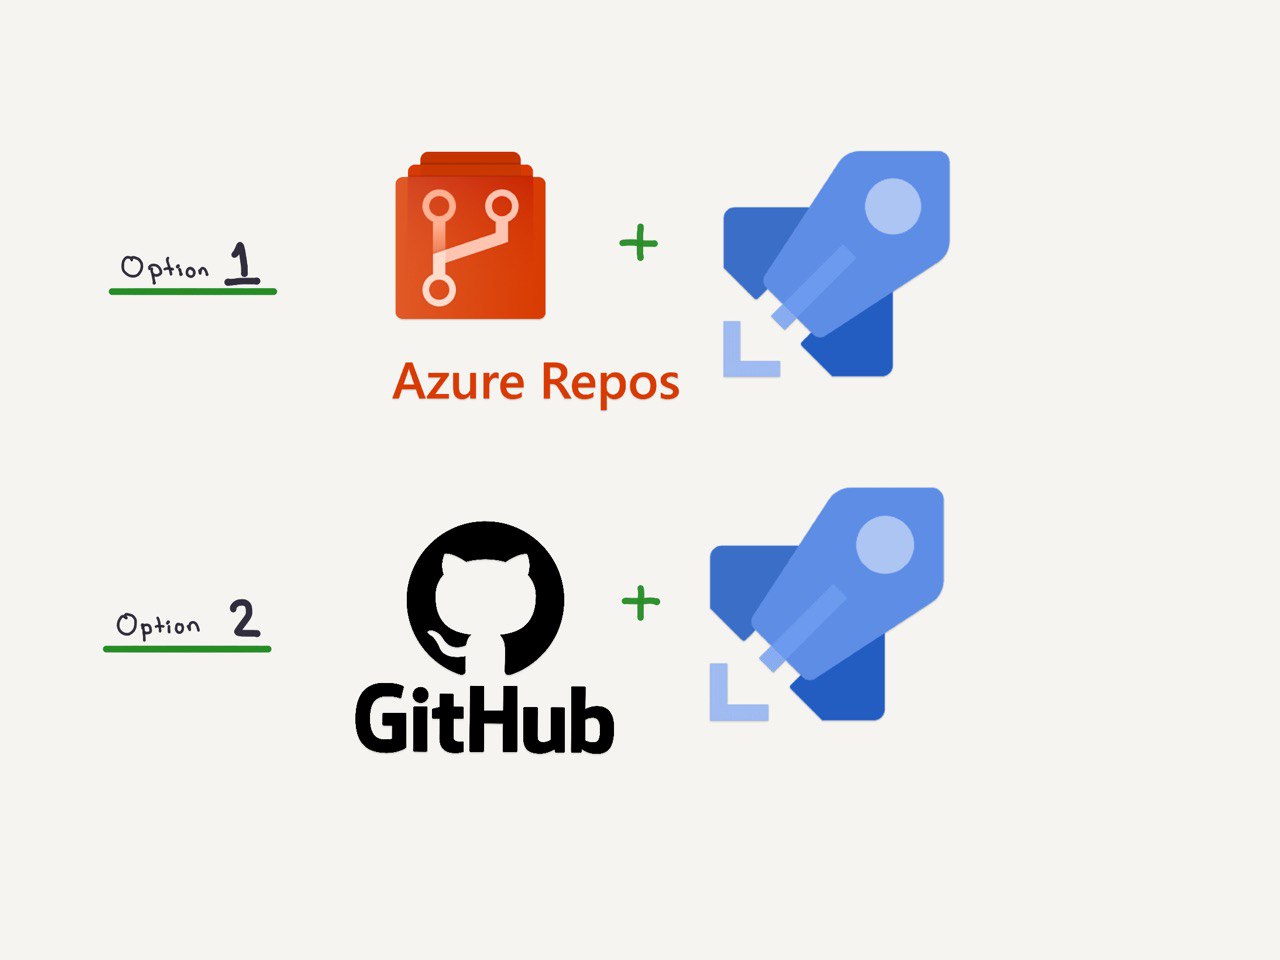
If you host your repository on github, it can be linked here and only use the Azure Pipelines feature.
In my case, I am choosing to store my code in this same platform, in azure repos, in order for my workflow to be smoother, and I will be able to see all of my work in one same web page. It just makes more sense for me. However, if you already have your code on github, it will work too.
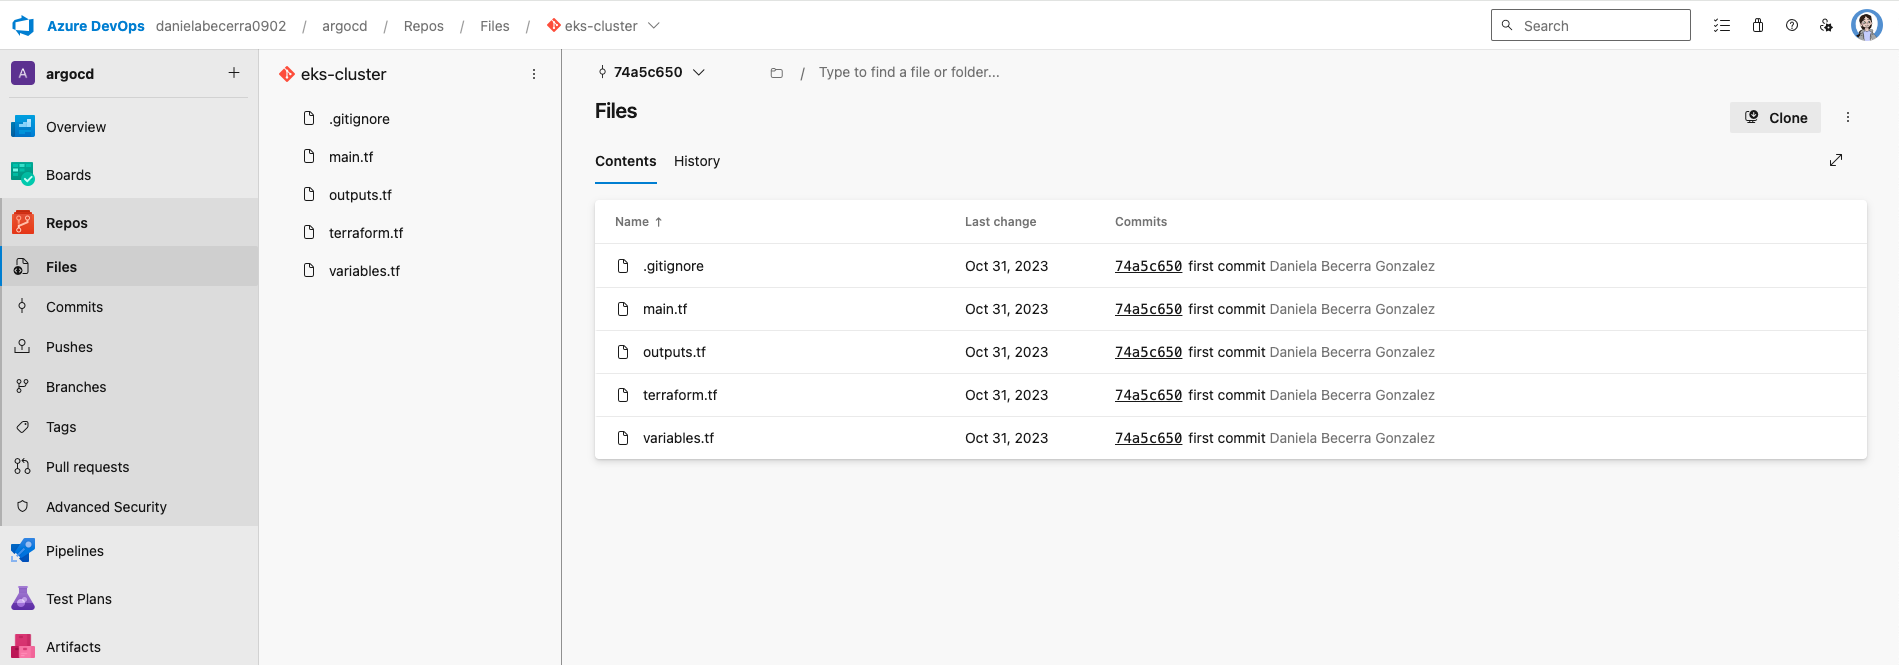
Which code am I talking about? The repository with terraform code for the EKS cluster. Those files are stored on a repository in my azure devops account under a project I created called argocd. This is how my repository looks like at the beginning.
Another feature that I like about AzDo, is that by default my project including repos, pipelines etc are private. It can be easily changed to public in the project settings.
Set up a service connection
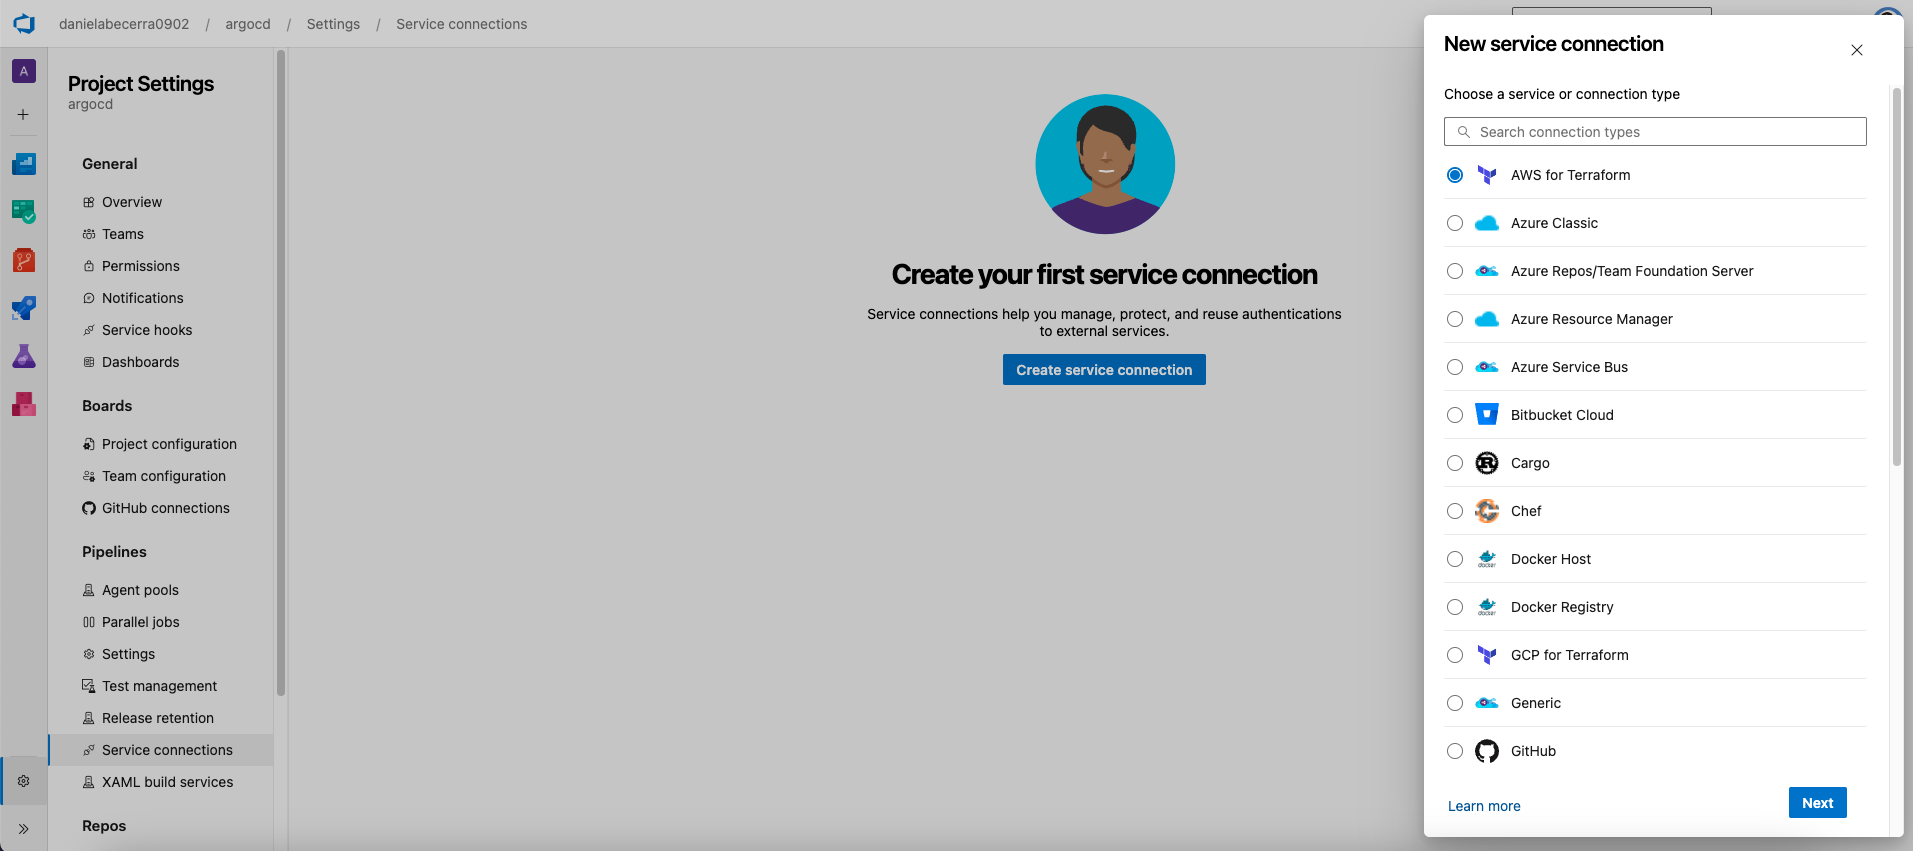
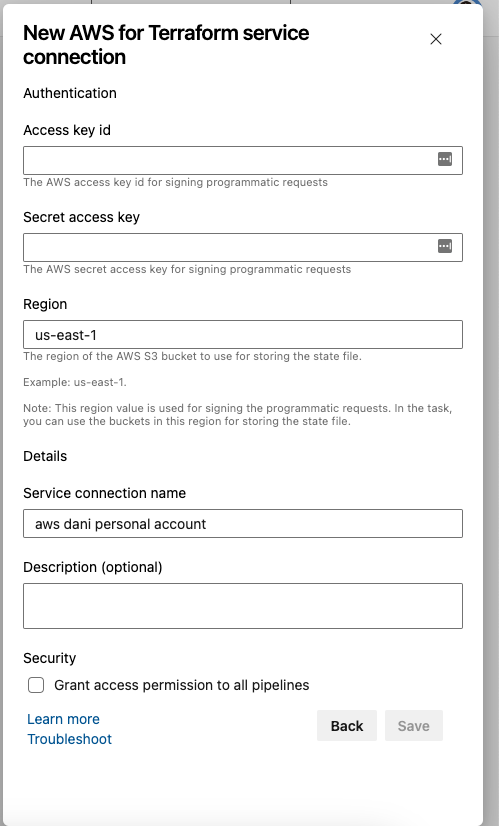
In the previous tutorial, a prerequisite as to have IAM credentials in order to be able to run the aws cli commands and terraform commands from your local computer. This time, we want the service of azure devops to be able to run the terraform commands connecting into our aws account, for that we also need to give the credentials to azure devops. This is called a service connection. There are many types of service connections, thus many services that you can link to azure devops. We are going to choose the "AWS for Terraform" kind.
Go to project settings in the gear icon on the lower left-hand corner of the screen.
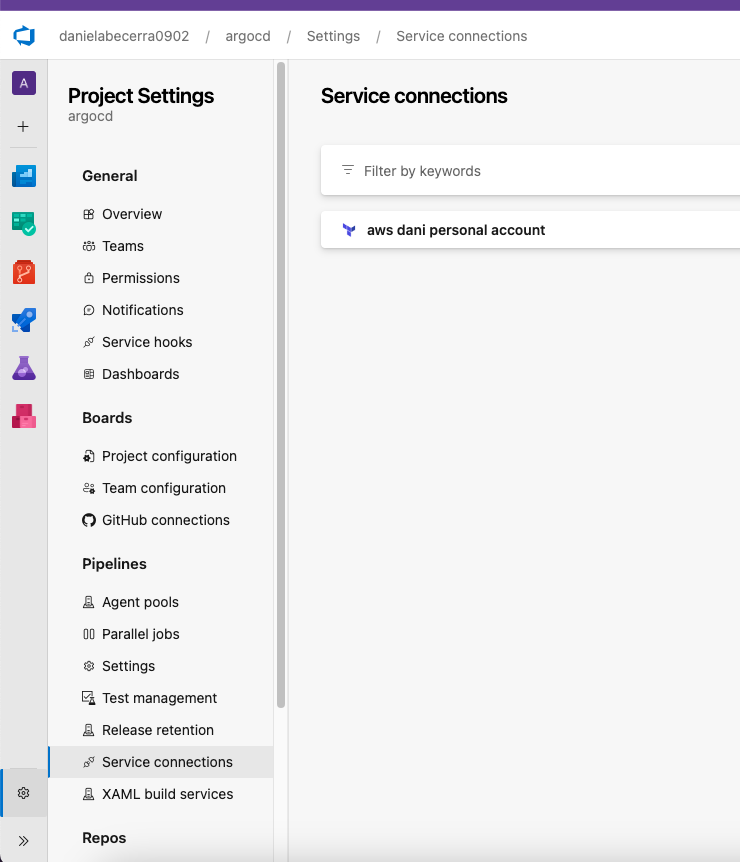
In the side bar, under Pipelines, choose Service connections, and then click on the button "New Service connection" on the upper right-hand corner of the screen.
Another pre-requisite of the previous tutorial that also applies here is to have the backend of your terraform state stored in a AWS S3 bucket.
Click next and fill in the fields with your access key id and secret access key.
You can name the service connection something meaningful for you and the project. Click Save.
Once it's setup, you will be able to see it like this
Write your pipeline for the terraform workflow
Azure devops pipelines are written in the yaml format and have a very basic outline. Azure devops is a service on the cloud where you will use Linux or windows hosts to run your steps. Therefore you can use bash scripts for the simplest steps or powershell, or windows commands if necessary.
In this tutorial we will use an ubuntu host. But instead of using the simplest bash step, to run terraform init, plan, etc. We will use the official terraform task. Where we input the relevant parameters and the rest is handled gracefully with the best practices.
Tasks in azdo pipelines are like libraries that you can use from a variety of services and publishers, either official or from the community. For example, to build with docker, gradle, .net, azure functions, etc. You can check them out here in the microsoft store. https://marketplace.visualstudio.com/azuredevops
Intro to azure pipelines
This would be a hello world pipeline.yml
trigger:
- main

stages:
- stage: Build
  displayName: Build
  jobs:
  - job: Build
    displayName: Build
    pool:
      vmImage: ubuntu-latest
    steps:
    - script: |
        echo Hello world
This would be a pipeline task where I build a docker image and push it to docker hub
- task: Docker@2
      displayName: Build and push to dockerhub
      condition: or(eq(variables['Build.SourceBranch'], 'refs/heads/main'), eq(variables['Build.SourceBranch'], 'refs/heads/develop') )
      inputs:
        containerRegistry: 'dockerhub'
        repository: 'danibish/my_first_bot'
        command: 'buildAndPush'
        Dockerfile: '$(Build.SourcesDirectory)/Dockerfile'
        tags: |
          $(GitVersion.SemVer)
And this is an example of a terraform task for terraform plan command
- task: TerraformTaskV3@3
        displayName: terraform plan
        inputs:
          provider: 'aws'
          command: 'plan'
          workingDirectory: '$(projectRoot)'
          environmentServiceNameAWS: 'aws dani personal account'
I hope now you get the idea.
Now, instead of just adding a file called pipeline.yml to your repository (which is totally possible and also normal for advanced users, you can use the pipeline editor assistant.
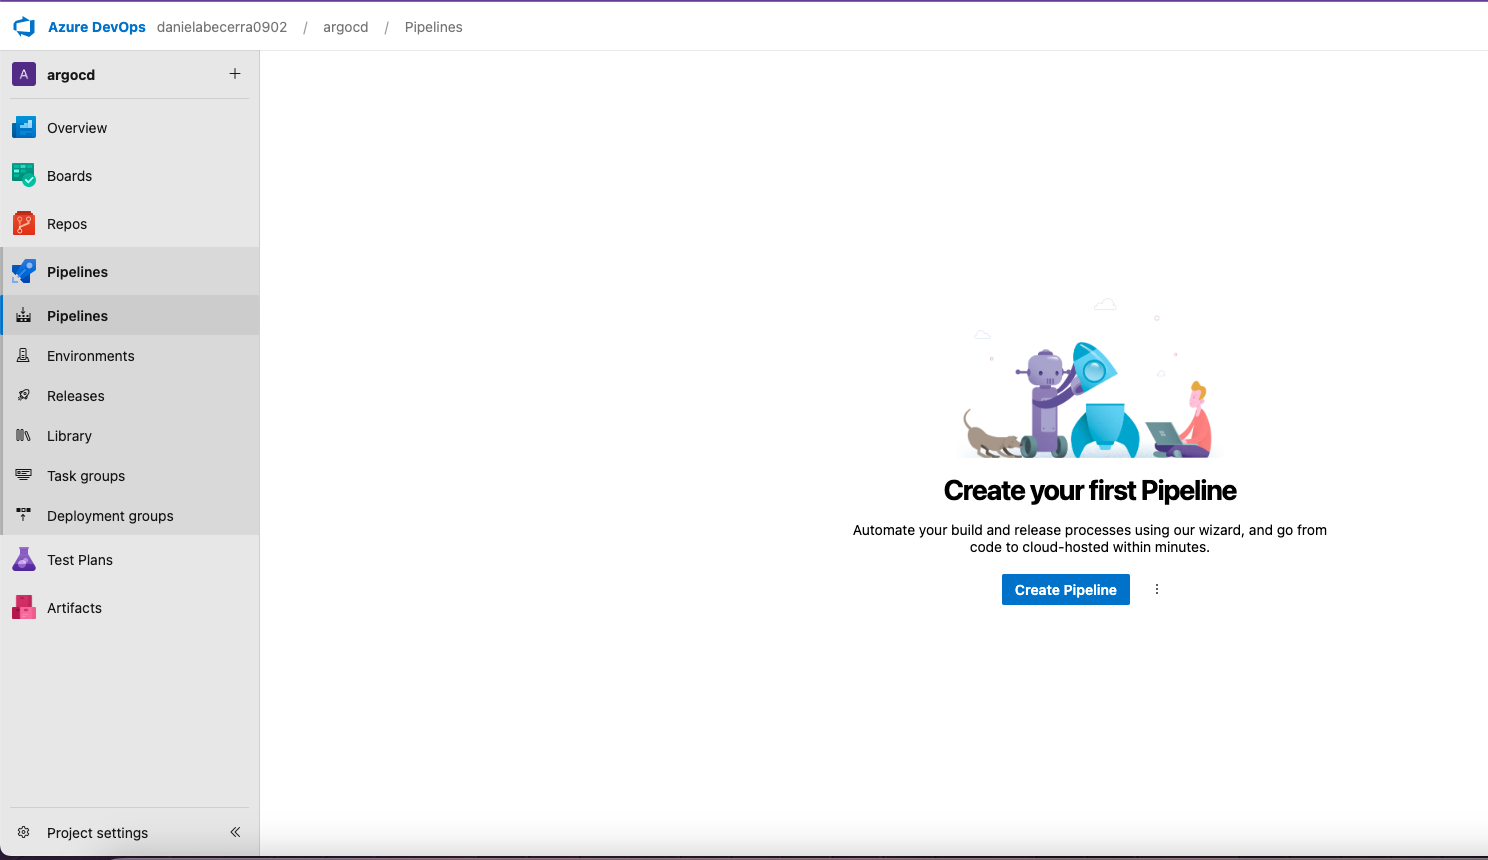
Create a new pipeline
In the side bar menu, click on Pipelines, and then on Create Pipeline
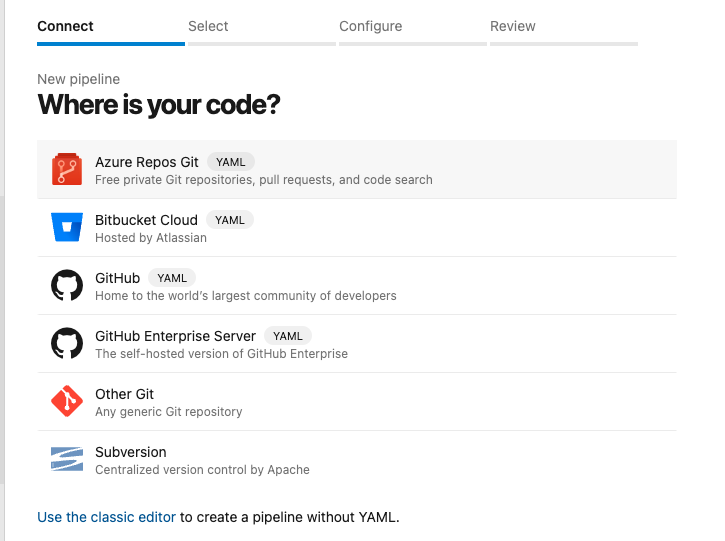
I have my code in Azure repos, so I choose that
Select the repository where you want to create the pipeline for (eks-cluster)

And then choose "starter Pipeline" because we don't have anything yet.
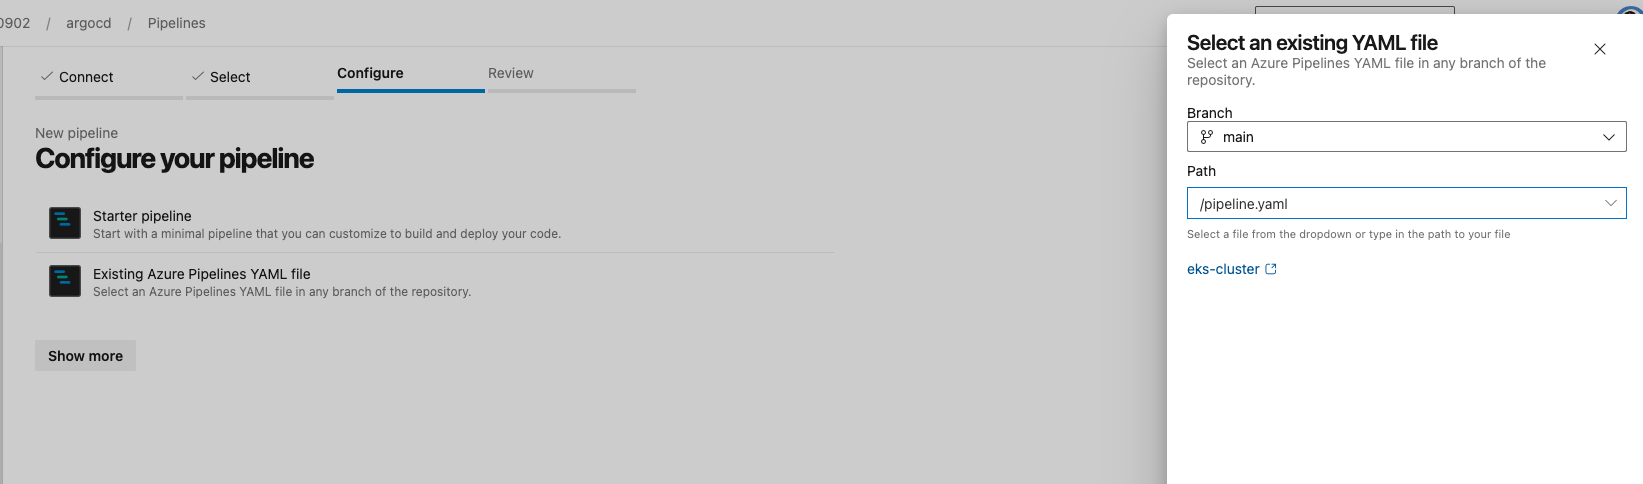
Erase whatever is in the editor and paste the following
trigger:
  branches:
    include:
    - main

variables:
- name: poolName
  value: 'Azure Pipelines'
- name: vmImage
  value: 'ubuntu-latest'
- name: projectRoot
  value: $(System.DefaultWorkingDirectory)

stages:
- stage: Terraform
  displayName: Deploy Terraform resources
  pool:
    name: $(poolName)
    vmImage: $(vmImage)

  jobs:
  - job: tf
    displayName: Terraform
    workspace:
      clean: all
    steps:
      - checkout: self
We have the first step that is cloning the repository into the workspace of the node that is running our pipeline. Next we need to add the terraform tasks
Set your cursor in a new line at the bottom of the file and start typing on the Side bar of the right that says "Tasks". Type terraform.
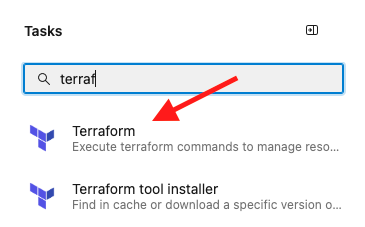
Make sure your cursor was in a new line, because when you finish filling in the fields of the task, the code will be generated wherever the cursor was, and it may happen that it was in the middle of an existing line and it will mess up your file.
Terraform init task
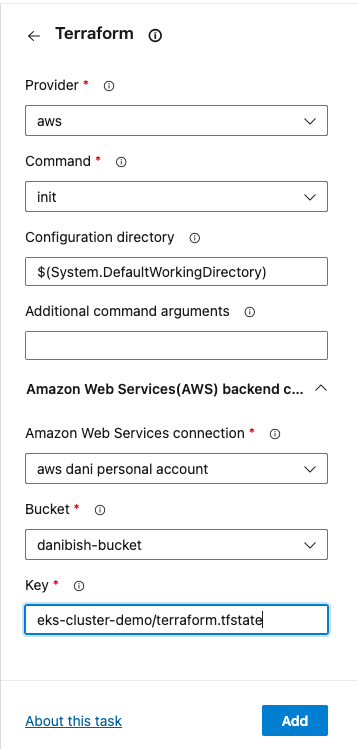
First we are going to create the terraform init task
Choose the appropriate options, then click add
| provider | aws |
| command | init |
| directory | $(projectRoot) |
| AWS connection | the name of the connection you setup in the earlier step, it will appear on a dropdown menu |
| bucket | The bucket where you setup the tfstate backend. Your existing buckets will appear in a dropdown menu, too. |
| key | The path inside your bucket to the tfstate file. |
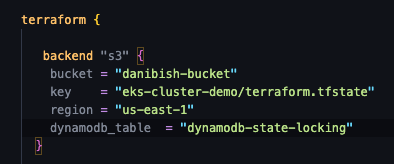
This information should match with the fields you have in your terraform block on the terraform.tf file of the repository.
Validate, plan and apply tasks
Do the same for the other three terraform tasks. And choose the appropriate options. Continue to choose the same aws provider service connection but choose a different command each time.
It is a good idea to include plan and apply separately, even though the apply will show you the plan. If the apply fails, you still have as a log that the plan was executed successfully, or not, and it will give you more information to debug.
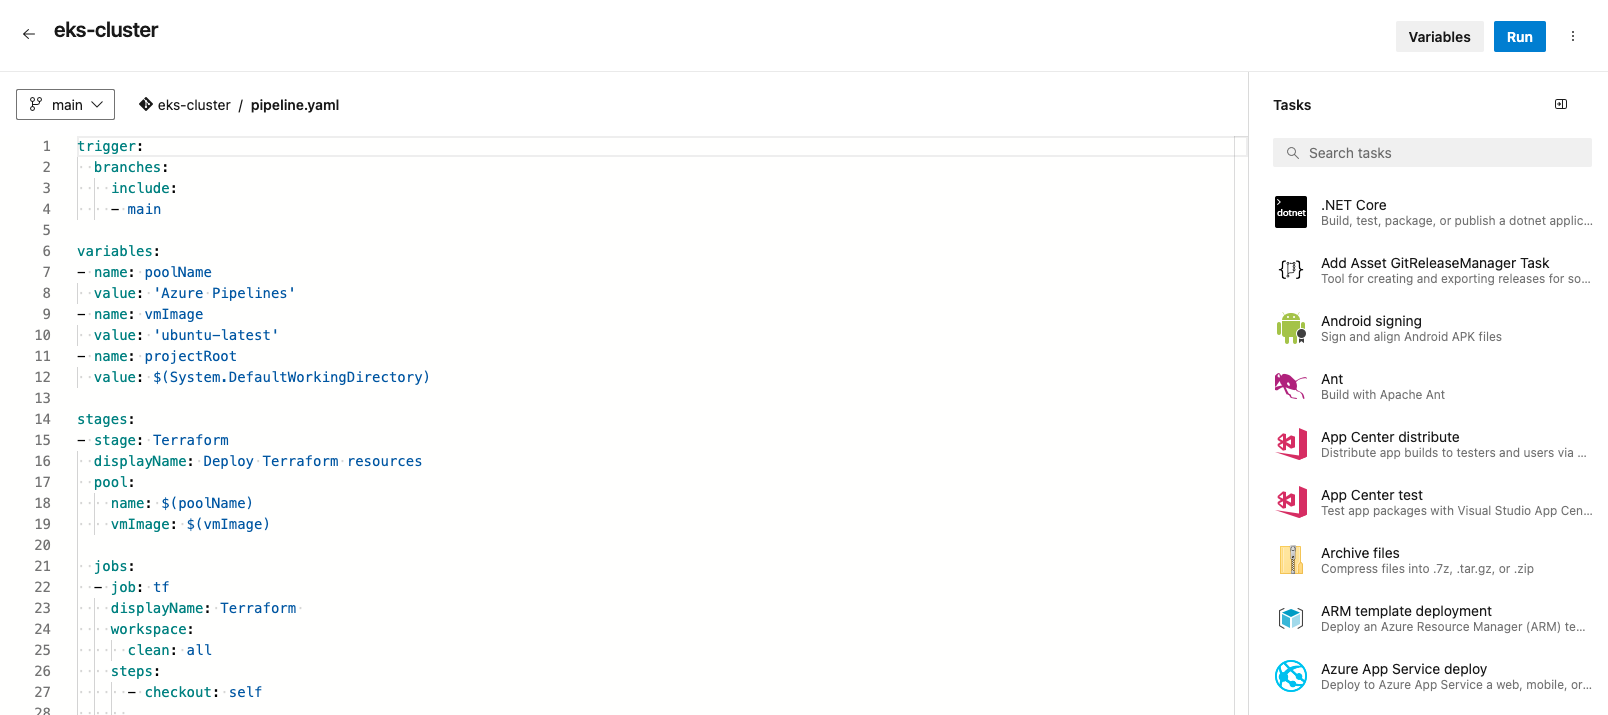
My pipeline.yaml looks like this at the end
trigger:
  branches:
    include:
    - main

variables:
- name: poolName
  value: 'Azure Pipelines'
- name: vmImage
  value: 'ubuntu-latest'
- name: projectRoot
  value: $(System.DefaultWorkingDirectory)

stages:
- stage: Terraform
  displayName: Deploy Terraform resources
  pool:
    name: $(poolName)
    vmImage: $(vmImage)

  jobs:
  - job: tf
    displayName: Terraform
    workspace:
      clean: all
    steps:
      - checkout: self

      - task: TerraformTaskV3@3
        displayName: terraform init
        inputs:
          provider: 'aws'
          command: 'init'
          workingDirectory: '$(projectRoot)'
          backendServiceAWS: 'aws dani personal account'
          backendAWSBucketName: 'danibish-bucket'
          backendAWSKey: 'eks-cluster-demo/terraform.tfstate'

      - task: TerraformTaskV3@3
        displayName: terraform validate
        inputs:
          provider: 'aws'
          command: 'validate'
          workingDirectory: '$(projectRoot)'

      - task: TerraformTaskV3@3
        displayName: terraform plan
        inputs:
          provider: 'aws'
          command: 'plan'
          workingDirectory: '$(projectRoot)'
          environmentServiceNameAWS: 'aws dani personal account'

      - task: TerraformTaskV3@3
        displayName: terraform apply
        inputs:
          provider: 'aws'
          command: 'apply'
          workingDirectory: '$(projectRoot)'
          commandOptions: '-auto-approve'
          environmentServiceNameAWS: 'aws dani personal account'
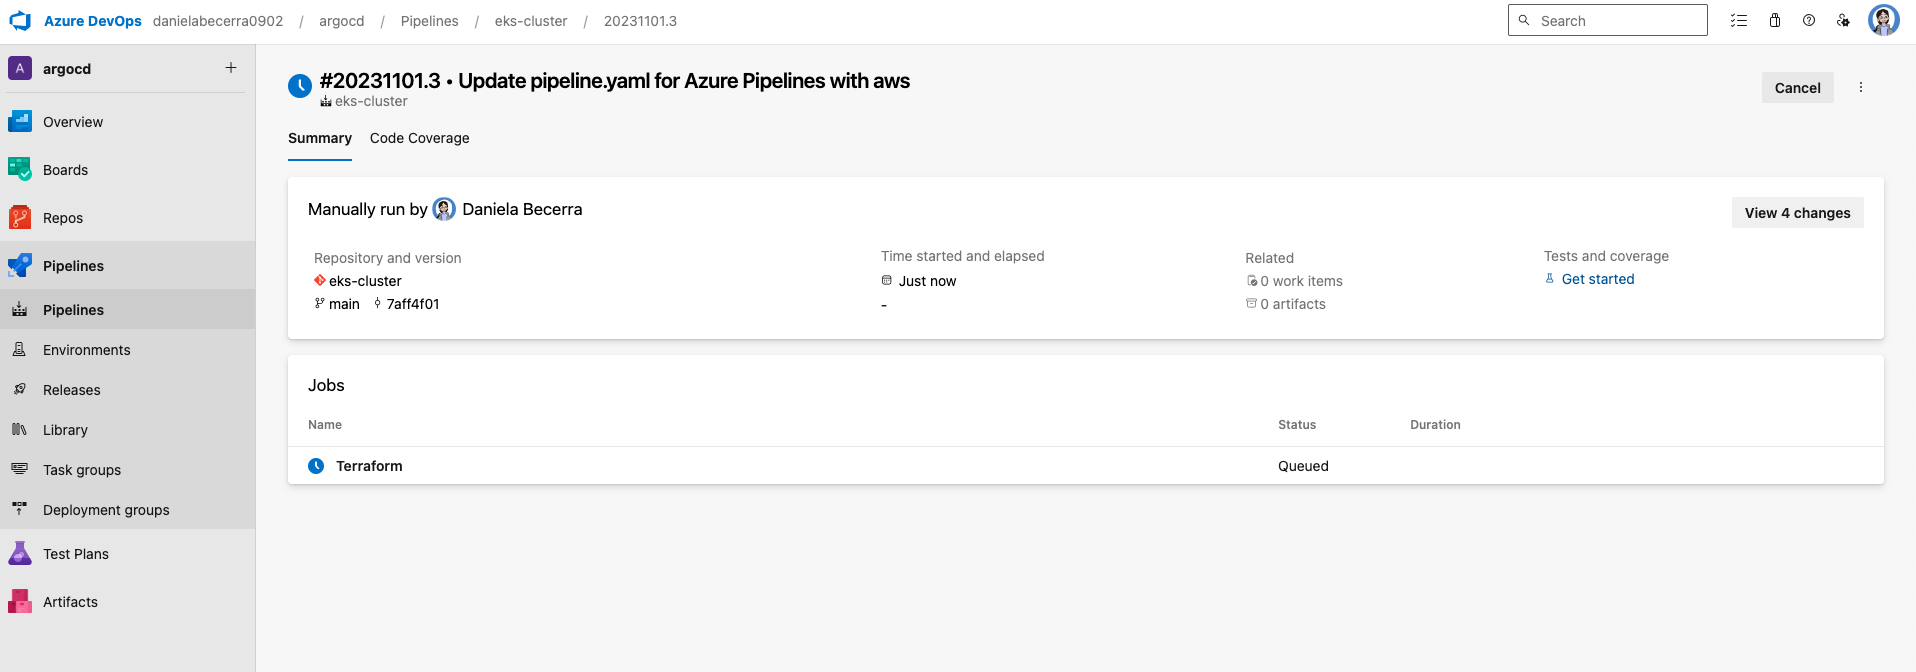
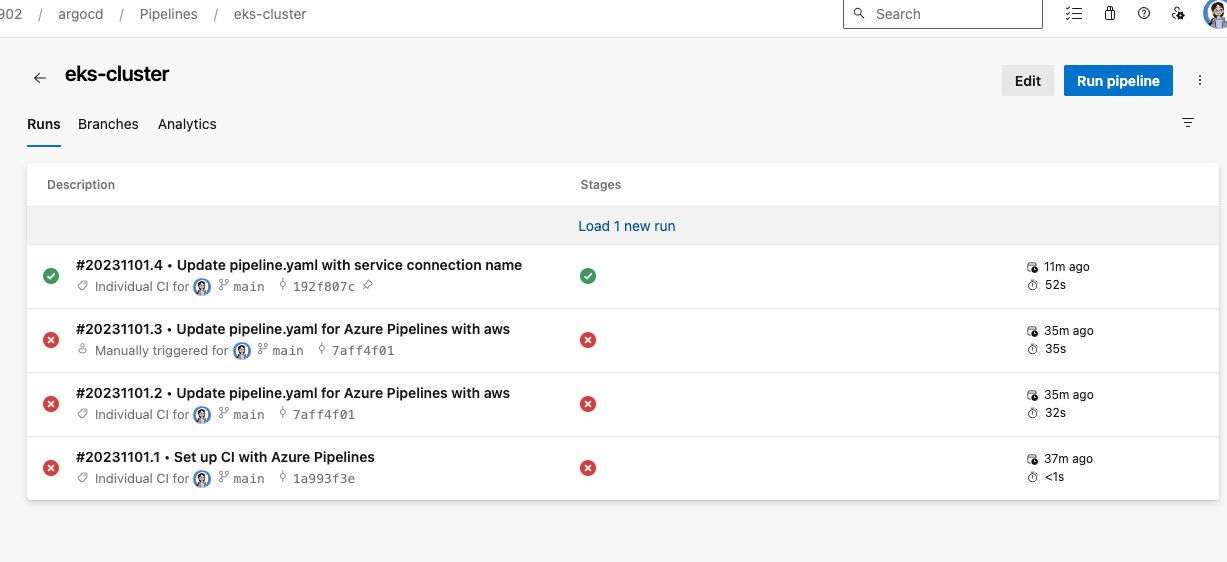
Save and run pipeline
Once your yaml is complete, click on save and run, and your pipeline will start executing in AzDo. You will be able to see the output from the commands in the window with a terminal style format
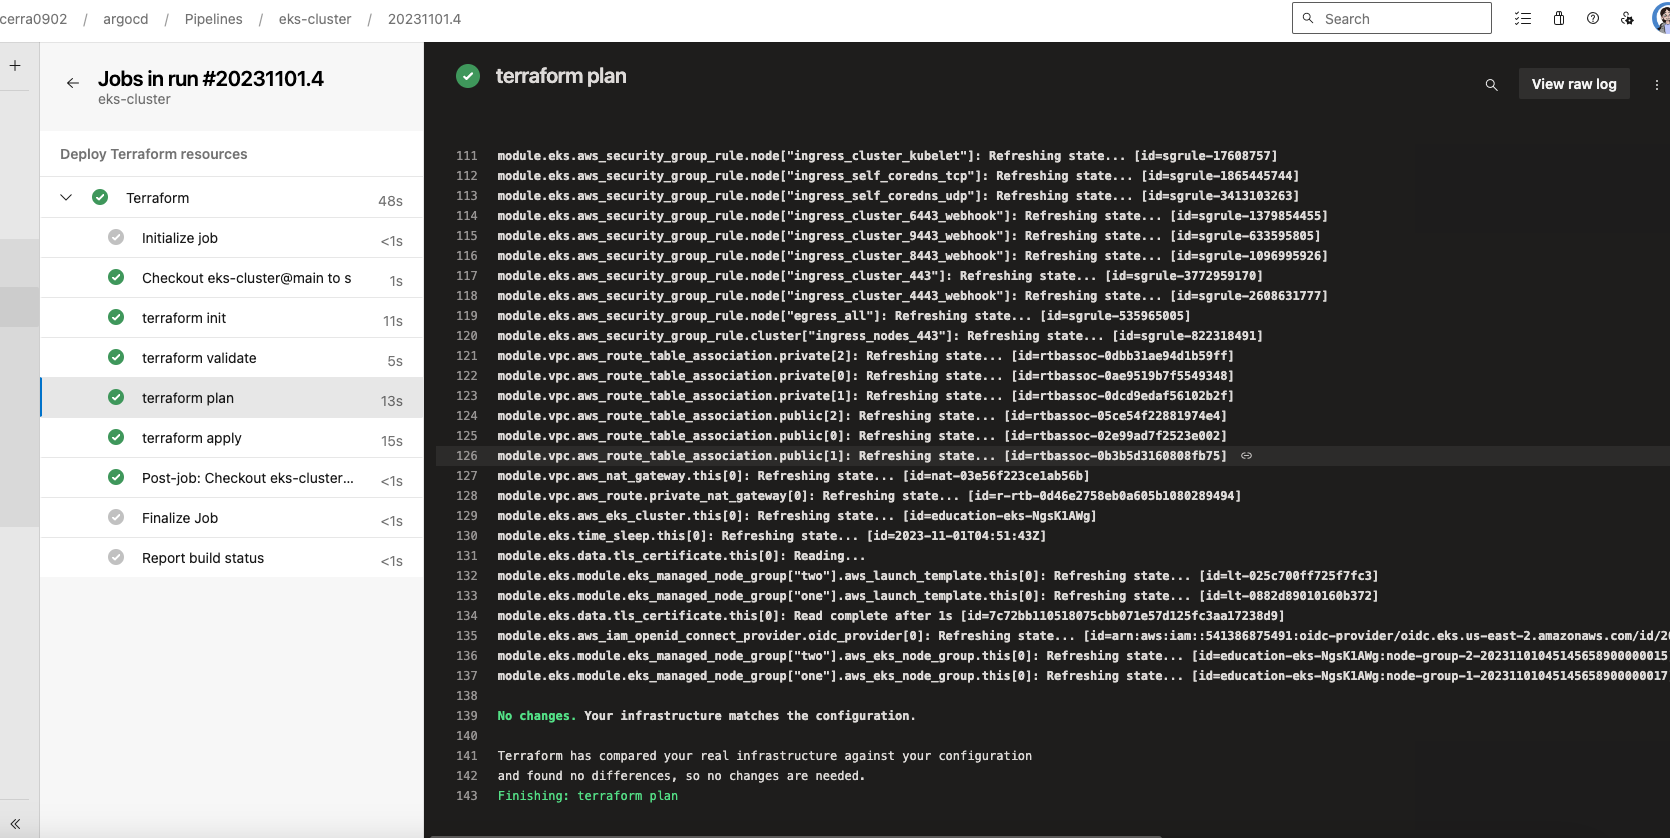
Even though there were no changes, in the apply step we can still see the tf outputs.
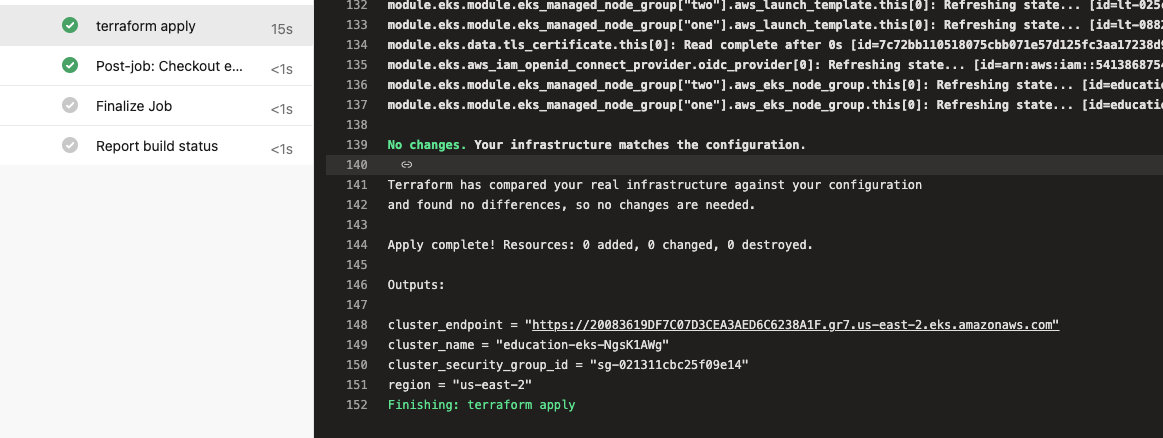
This pipeline was very fast and shows no changes, because my resources were already deployed using my terminal in my local computer, and the terraform state was already remote, so running plan and apply did nothing. It was simply executed from another computer but with the same credentials. The new computer being the AzDo host provided to us with this service.
Next time, if I did a commit directly to the main branch of this repo (because it's a personal project), or if I merged a PR to the main branch, this pipeline will be automatically triggered, and the changes introduces will determine if the apply will reflect them accordingly.
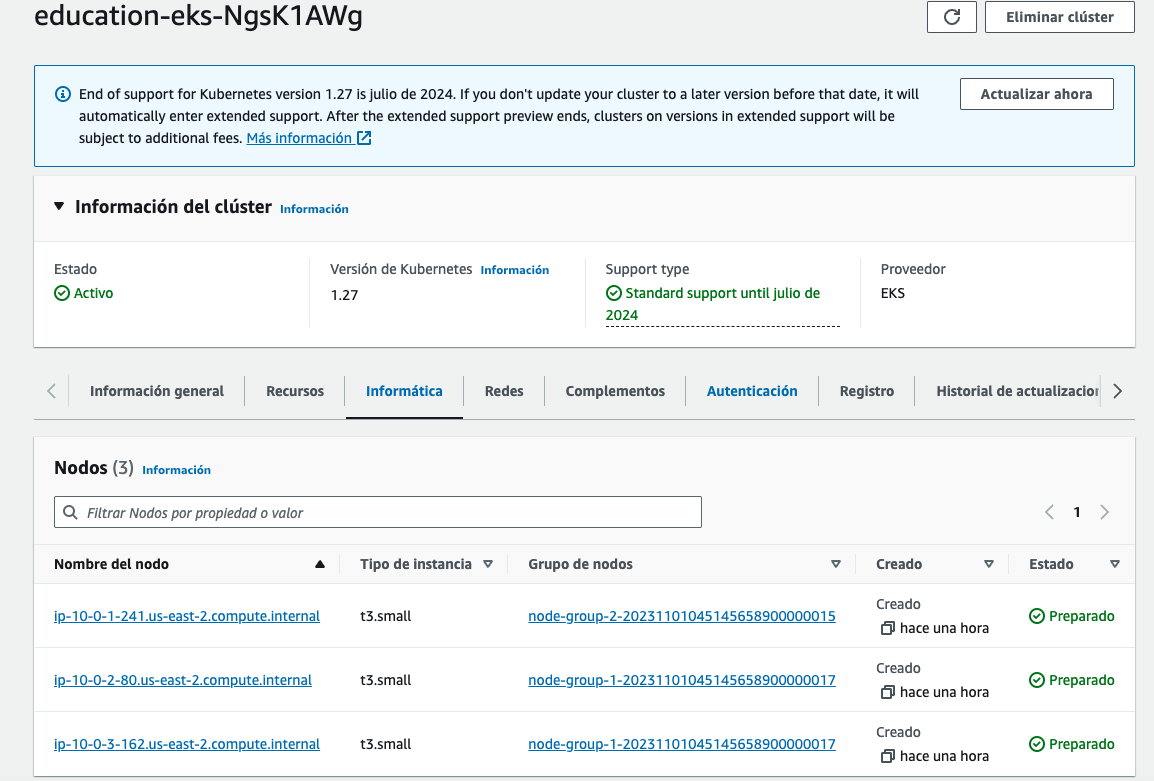
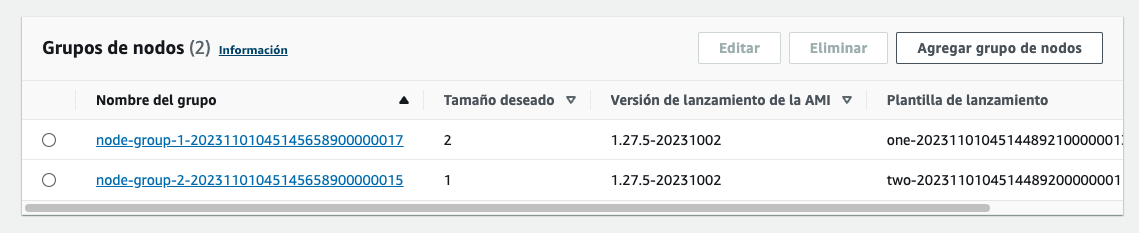
Validate existing EKS cluster on AWS console

Conclusion
This is it. You have deployed a kubernetes cluster on AWS Elastic Kubernetes Service using terraform's infrastructure as code and a CI/CD pipeline from azure devops!
Bonus: Destroy the cluster
To destroy the cluster and save money on your account while you are not working on it and before you continue to the next steps
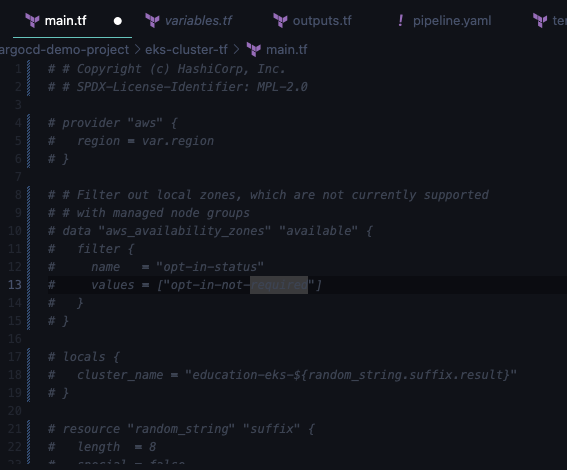
Select all your text of main.tf and output.tf using cmd+A and then cmd+/ to comment all the lines
Commenting all the file is the equivalent to erasing it, but keeping it for the next time you want to deploy it. You are saying to terraform, I don't want to have any of the resources anymore.
Commit the changes with a PR or directly to main, and watch the pipeline trigger automatically and destroy the resources.
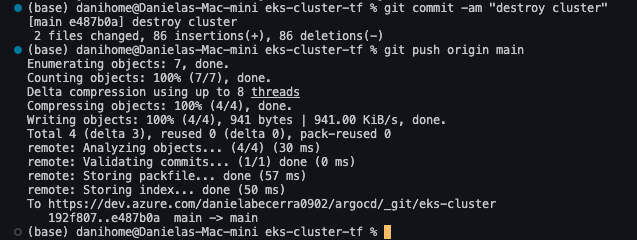

Here, we can confirm that the plan is to destroy everything
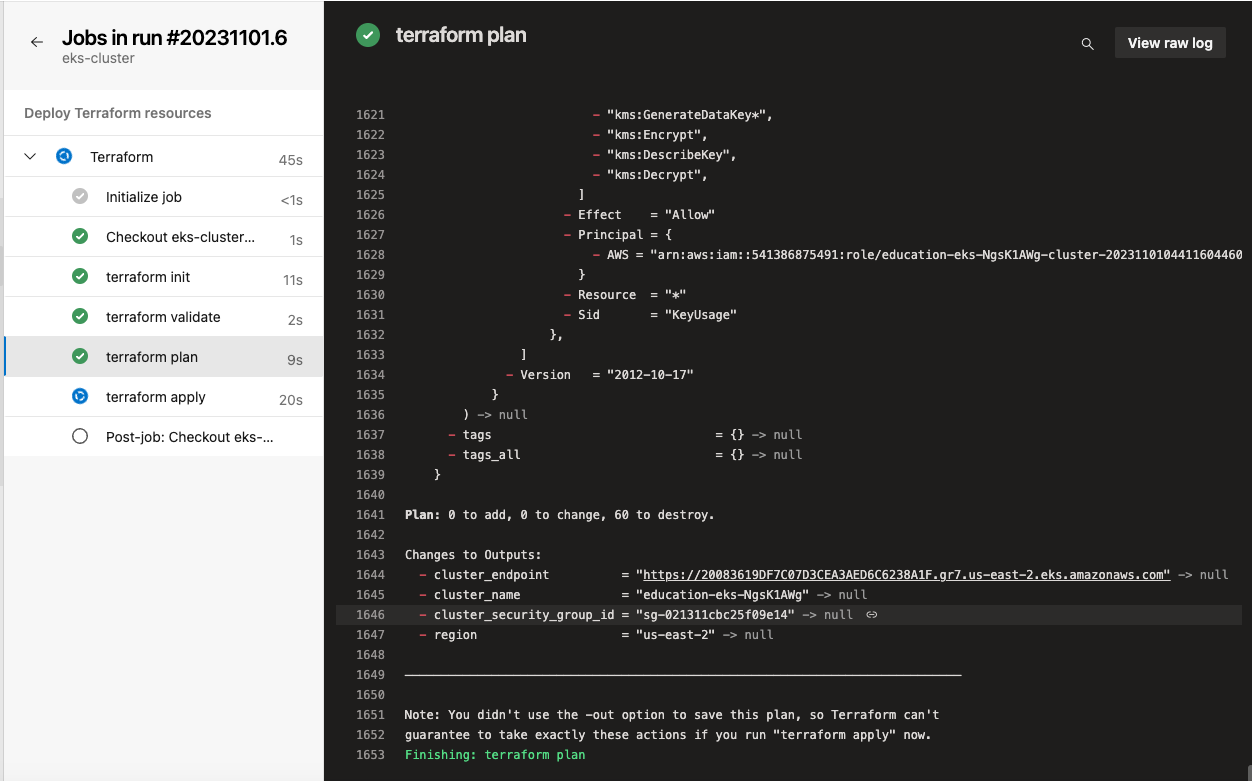
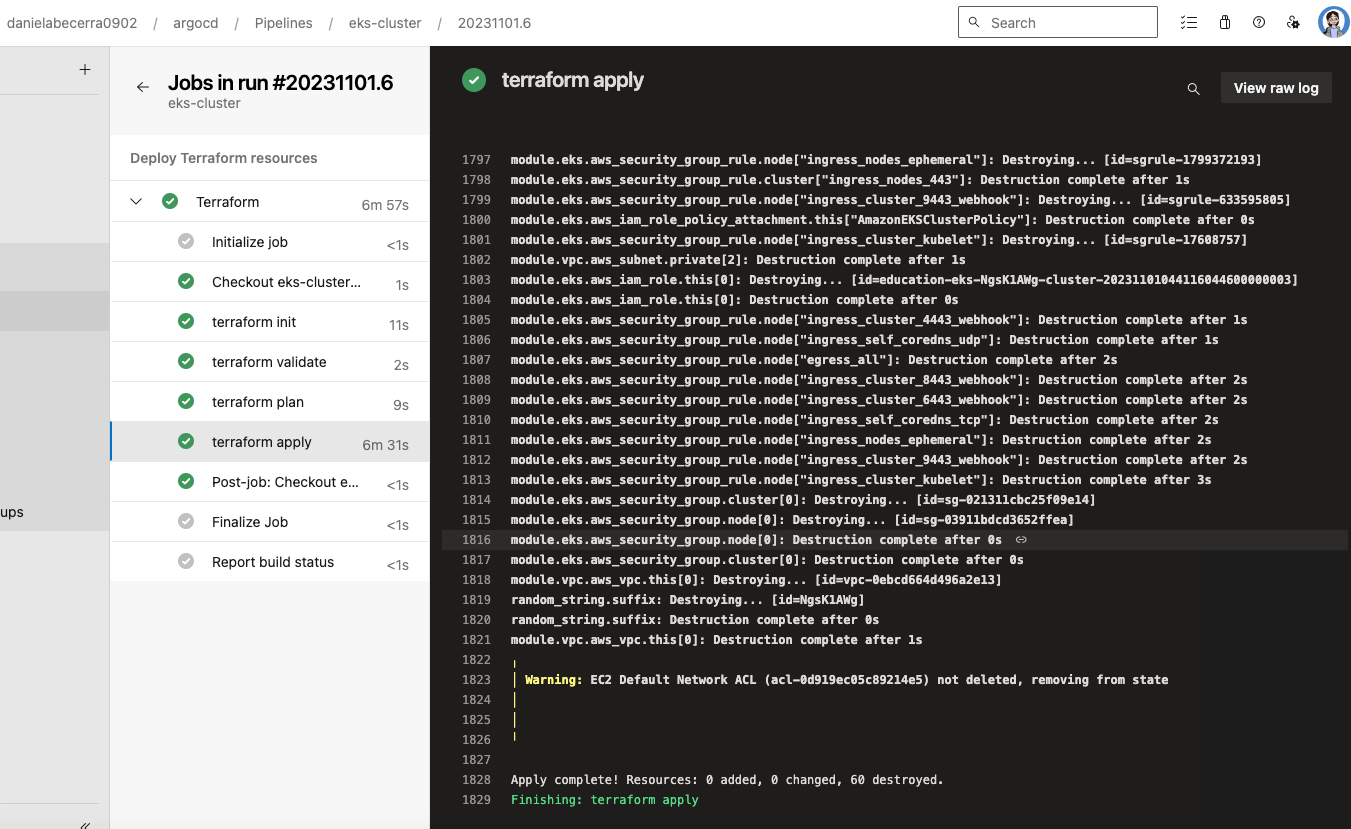
This pipeline took 6 minutes to destroy all the resources.
Now that's the end of the bonus section. See you later!